fbpx

How a Botanical Artist Looks at a Rose with Maria Cecilia Freeman

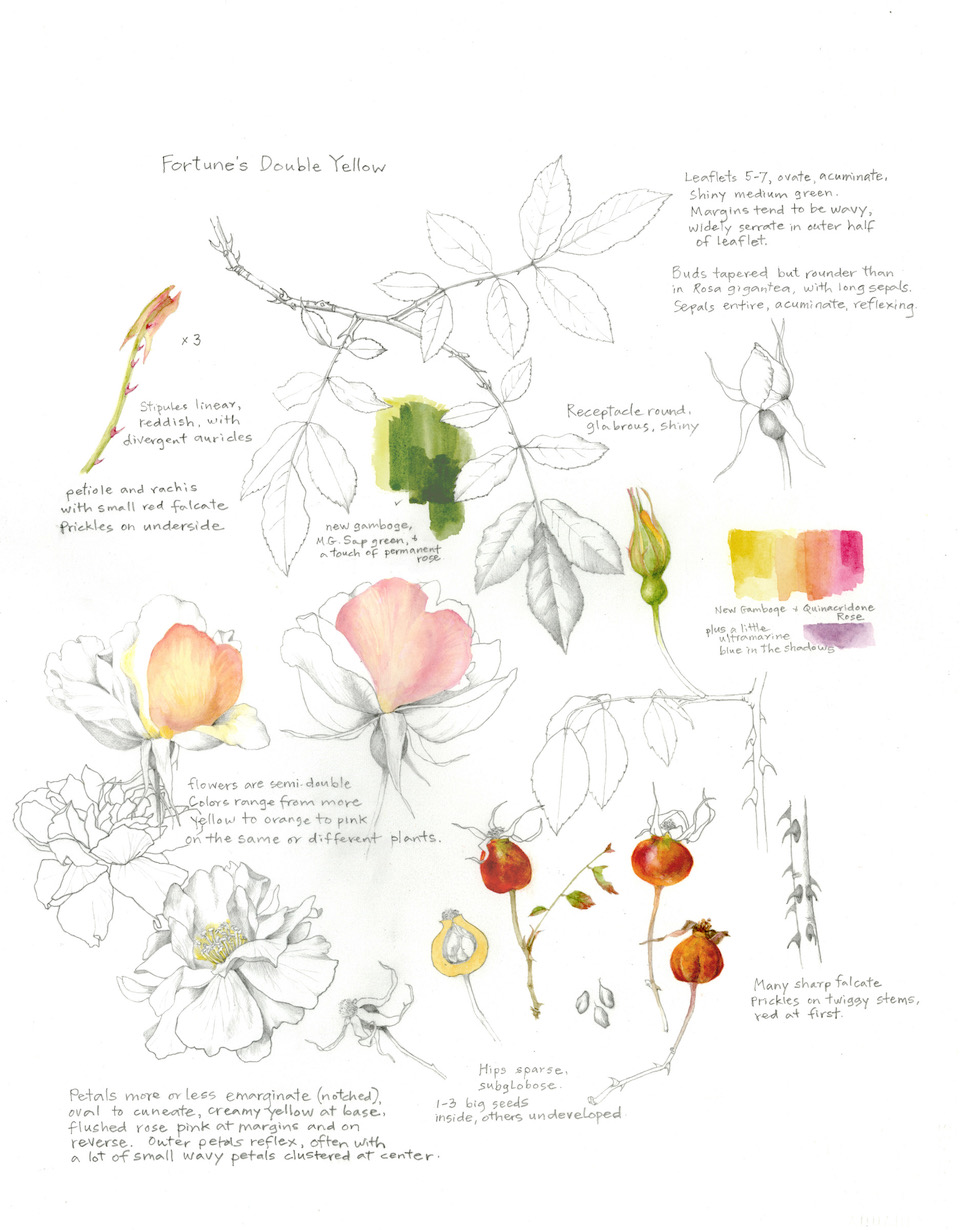
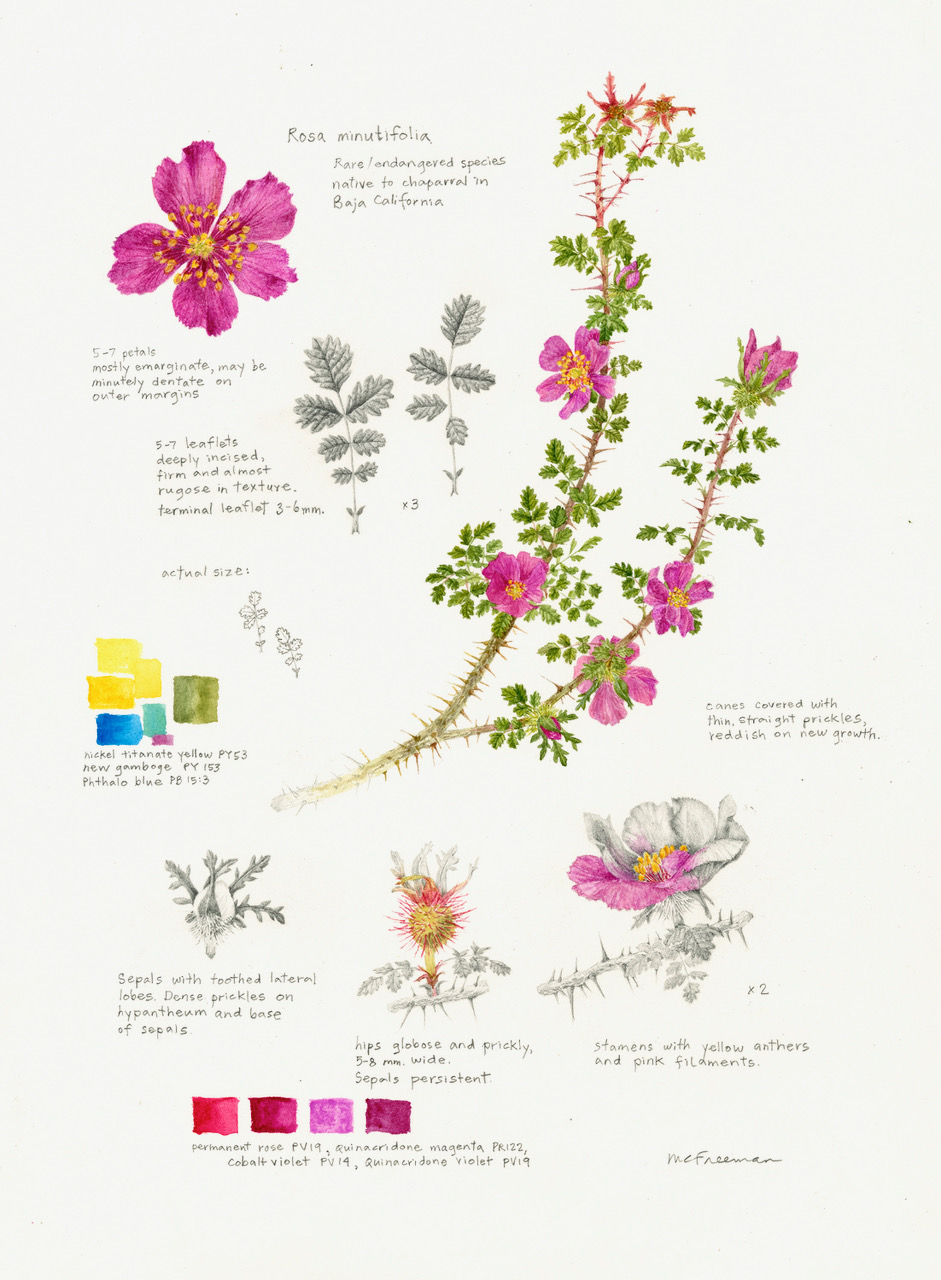
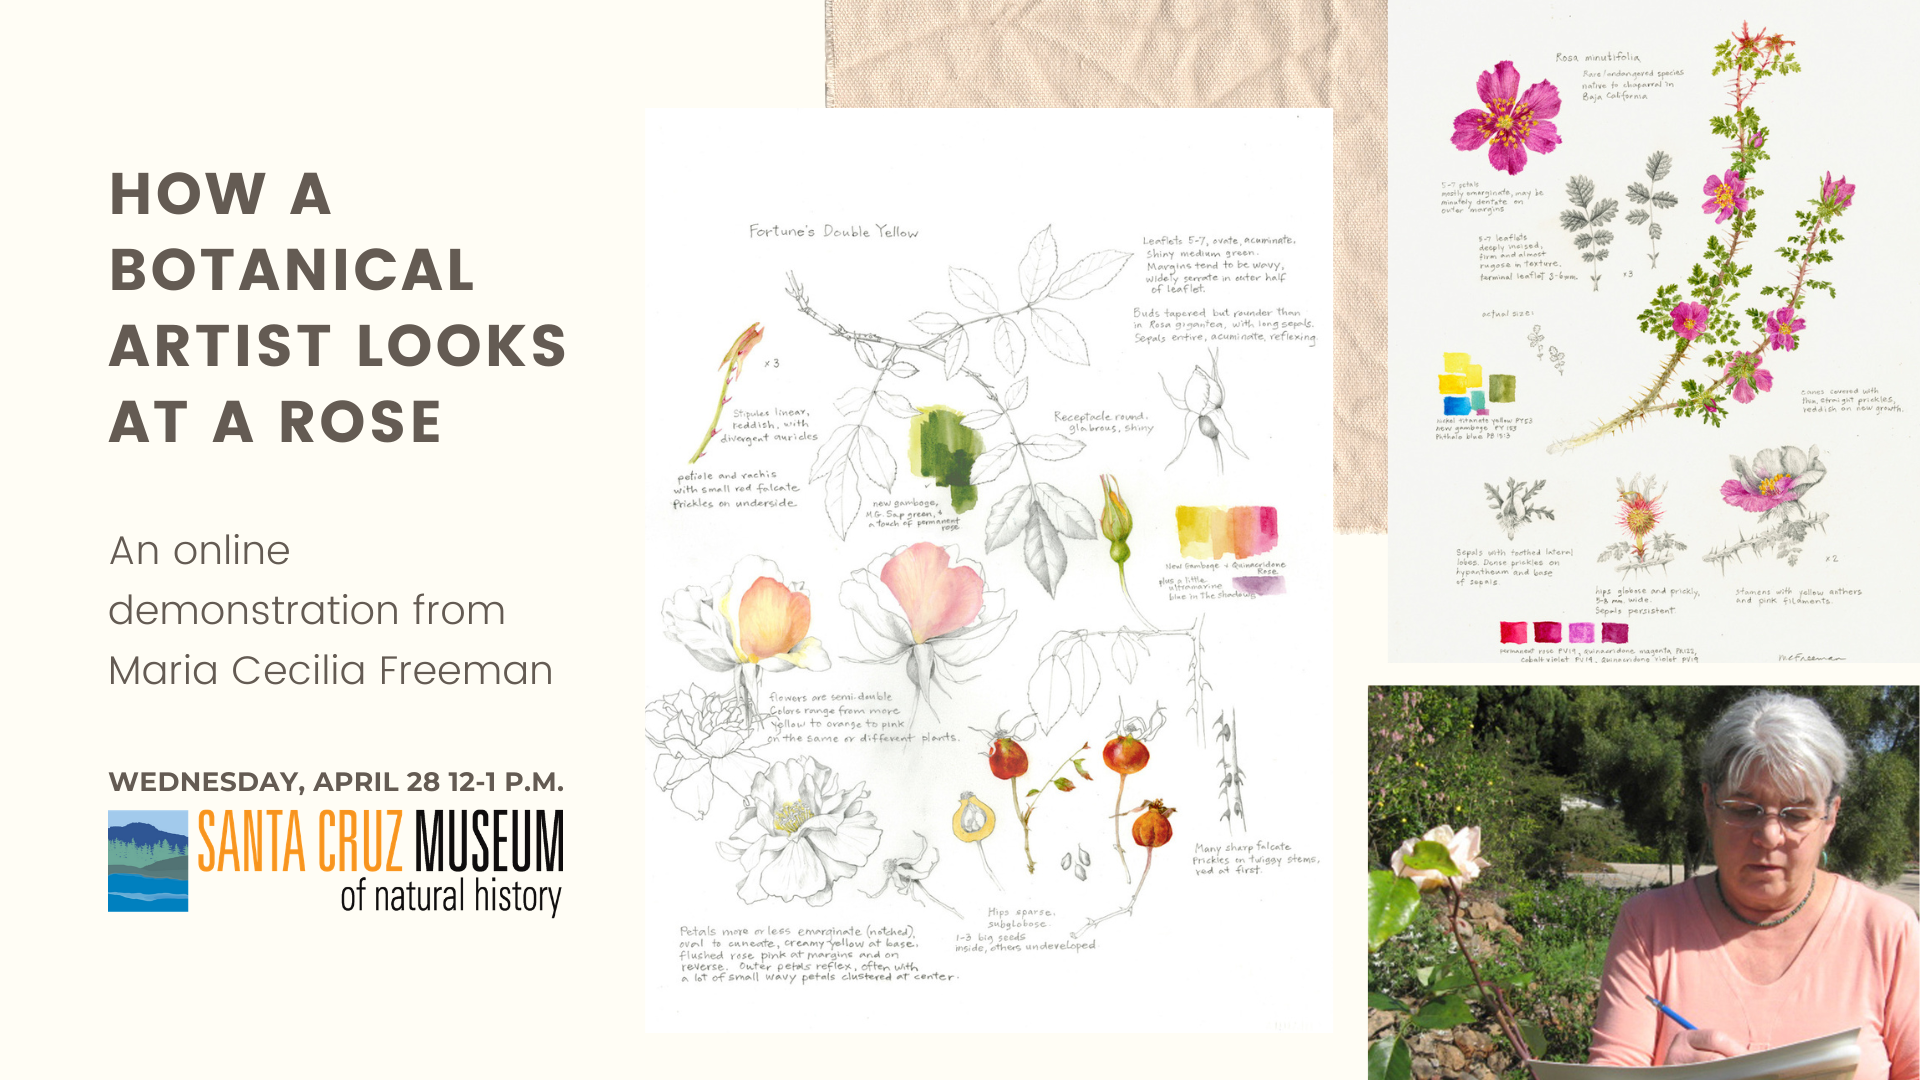
Learn how to get to know a rose in order to illustrate it. We’ll explore native and heritage roses and observe their particular characteristics. During this online lecture, Maria Cecilia Freeman will demonstrate how to draw and paint petals, leaves, and other parts that help distinguish a rose. Once you draw the identifying parts of a particular rose, you’ll recognize it wherever you see it.

This program is in support of our science illustration exhibit, The Art of Nature, on view online and in-person at the Museum.

About the Artist

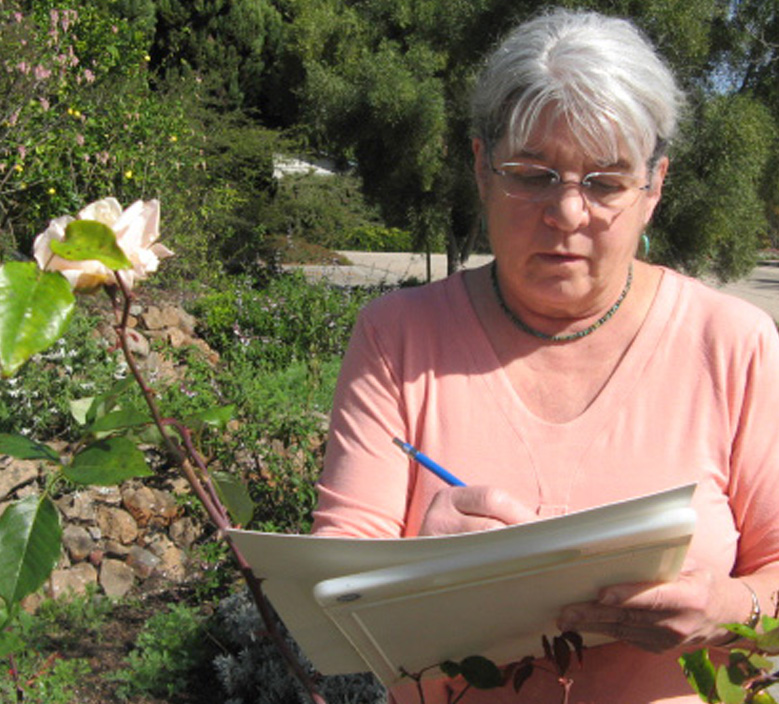
Maria Cecilia (Cissy) Freeman gardens, paints, and teaches in Aptos, where she finds or grows many of her plant subjects. Her work includes scientific illustration and botanically accurate fine art, often combining the two in graphite and watercolor studies. She takes a special interest in portraying native plant species with a view to their preservation, and she particularly loves drawing and painting heritage and species roses.

Her “Rose Studies” watercolors and drawings have appeared in solo exhibitions in Spello, Italy, at the Horticultural Society of New York, and at the San Francisco Botanical Garden. Her work has been included in juried exhibitions in the U.S. and Europe, and numerous publications. She is a member of the Northern California Society of Botanical Artists and the Guild of Natural Science Illustrators. To see her artwork, visit http://www.mcf-art.com.

The Art of Nature Events

How to Create a Moon Phenology Wheel

Happy Moon Day! In honor of the anniversary of the first human steps on the moon, we’re celebrating space exploration — from the comfort of your home.

Study your environment to the pace of our lunar cycles with this moon phenology wheel activity.

For more on Phenology Wheels, check out this activity!

Explore more resources about SPACE
Explore more resources about NATURE JOURNALING
Post by Marisa

Learn more about astronomy with these resources in our Online Museum Store.

Summer Solstice Sun Prints

A summer solstice sun print being made

Happy Summer Solstice! What better way to celebrate than creating art with sunlight? Follow along and harness the power of the sun to create your own sun prints using objects found in nature, construction paper, and sunlight.

Astronomically, the June solstice marks the first day of summer for the Northern Hemisphere, but many cultures consider this event to signal midsummer. This year, solstice occurs at 2:34 p.m. PDT on Saturday, June 20, 2020, which is the exact moment that the Earth’s North Pole is leaning most toward the sun.

The materials for a sun print laid out

Materials:
Construction paper
Nature objects

Optional:
Saran wrap
Plexiglass
Tape
Scissors

  1. Place object(s) on construction paper. If your object is heavy, like a rock, move on to step two! If it is lighter, like a feather or leaf, you may want to tape it down (masking tape works best), or put a piece of saran wrap or plexiglass over the paper (glass won’t work because it will block the UV rays from the sun, which we need to make our prints). You can also cut paper into shapes and tape them to your construction paper.
  2. Place paper under the sun. Since we’re doing this on the solstice, we’ll have many hours of daylight — more than any other day of the year! Hopefully we also have sunny skies with few clouds, which will make our project go faster. If not, however, that’s okay. Just leave your paper out longer. Give your project at least two hours in the sun. Place your paper on the ground and make sure everything is secure so that the wind won’t blow anything away.
  3. Remove objects and enjoy your artwork! Why do you think the sun changed the color of the paper? Why did the paper not change color where the objects were placed?
A small collection of sun prints

Post by Marisa

How To Draw a Flower Video

Do you enjoy looking at flowers? What do you want to learn about flowers? Use this step-by-step guide to learn about the different parts of a flower through illustration. Afterwards you will be able to identify perfect and imperfect flowers.

Explore more about plants with the resources in our Online Museum Store.

Post by Elise

Phenology Wheel Activity

All around us, things are constantly changing. Spring rains come and bring new flowers, baby birds are hatching from eggs, and new green leaves emerge on trees. Can you think of some ways you have observed changes in nature? 

Artwork by Ivy Kae from The Art of Nature Exhibit
  • Phenology is the study of cycles and patterns in nature. You can practice phenology by making observations in nature and noticing how things change over time! Create a phenology wheel of your own as a tool to record your observations about a natural phenomenon in your own life! 
  • A phenology wheel is simply a way to keep track of the observations you are making about your chosen subject in nature.
    • Here is a detailed guide for creating your own wheel.
    • Or you can use this template!
  • To use the wheel, spend some time making observations in nature for a day, week, month, or even an entire year! You can focus on one species or a special spot outside your window or place of your own choosing

Here  are some prompts to help inspire you to create your own wheel! Check out the detailed guide below for even more ideas. 

  • Look outside your window each day for a week. What do you notice? What has changed? 
  • Look up at the sky! Each night, record your observations of the moon throughout its phases on your phenology wheel.
  • What’s the weather? Track the weather where you live for a week/month/year. 
  • Do you see any animals regularly near your home? Such as a bird? What do you think it is doing?
Activity Guide: Creating Your Own Phenology Wheel (PDF | HTML)
Activity Guide: Creating Your Own Phenology Wheel (Spanish Version) (PDF)

Watch our Phenology Wheel Video.

Post by Ellen

Natural Pigments

Sourgrass with bright yellow blooms
Sourgrass produces a bright yellow color

Experiment with creating art from nature! Many plants and rocks have pigments inside of them that you can paint or draw with. You can even go one step further and try making your own paint brush from found natural materials! 

How to find materials

Look in sidewalk cracks for leaves or flowers and look in dirt patches for different types of rocks. Look on bushes or trees for berries, flowers, and leaves. My favorite is oxalis, more commonly known as sourgrass (pictured to the right). It is a yellow flower that is common in Santa Cruz and makes a highlighter yellow color when used as natural paint. Bonus: this plant is invasive and is often considered a weed that you could completely remove.

A cluster of blueberries
Look in your kitchen for pigment materials!

On the other hand if you want to create art from nature but want to stay inside you can do that too! Some of your food can be used to paint and draw. For example, you can use colorful spices such as turmeric or paprika to create paint by mixing the powder with water. Beets, purple cabbage, and berries will also work – they often turn my cutting board different colors when I am chopping them! If you have a fireplace you can even use the small pieces of burnt wood that are left behind to draw with or you can grind it up and mix with water to create black paint. 

Collecting plants

  • Be respectful of the plants you collect
  • Only take what you need or take less than 10% of a plant (If there are 10 leaves on the plant, take only 1 and find other plants to pick from if you need more)
  • Collect with permission on private property and do not collect in State Parks
  • Stay away from harmful plants such as poison oak and stinging nettle

Creating Paint

  • Use your hands or a spoon to grind up the plants or rocks 
  • Try adding water or soaking items in warm water to soften them
  • Be patient, making your own paint is an experiment and it will often give you interesting surprises! See what happens if you add baking soda or vinegar- sometimes this will change the color of a paint!

Questions to ponder

  • What colors do you predict will be created from your items?
  • Did any of the colors surprise you? Why?
  • How did the colors change over time?
  • How did the colors change when you added different things (like baking soda or vinegar)?

Post by Elise